HD interlaced workflow with iLife '08
In early 2009 I read various threads on the Apple forums about iMovie and its inability to handle interlace footage or HD properly, partly provoked by speculation over the iMovie '09 feature set. At the same time I ended up having to deal with all of this for a small home project. I found out that with iMovie '08 and a couple of free tools it's entirely possible to edit a movie in full 1920x1080 maintaining full resolution and interlace from camera to final target.
Here's how - but be warned, to maintain the very best quality throughout there are quite a few hoops to jump through, a lot of rendering time and a lot of disc space will be needed. It's so time consuming that, unless you really do want the more fluid motion afforded by interlaced video or have no choice but to capture interlaced video due to technical constraints, you may well be better off using progressive mode filming in the first place.
- Movie creation and editing
- Burning DVDs, Chapters and SD downconversion
- Appendix A: Workflow summary
- Appendix B: Storage space guide
- Appendix C: Video stabilisation
Movie creation and editing
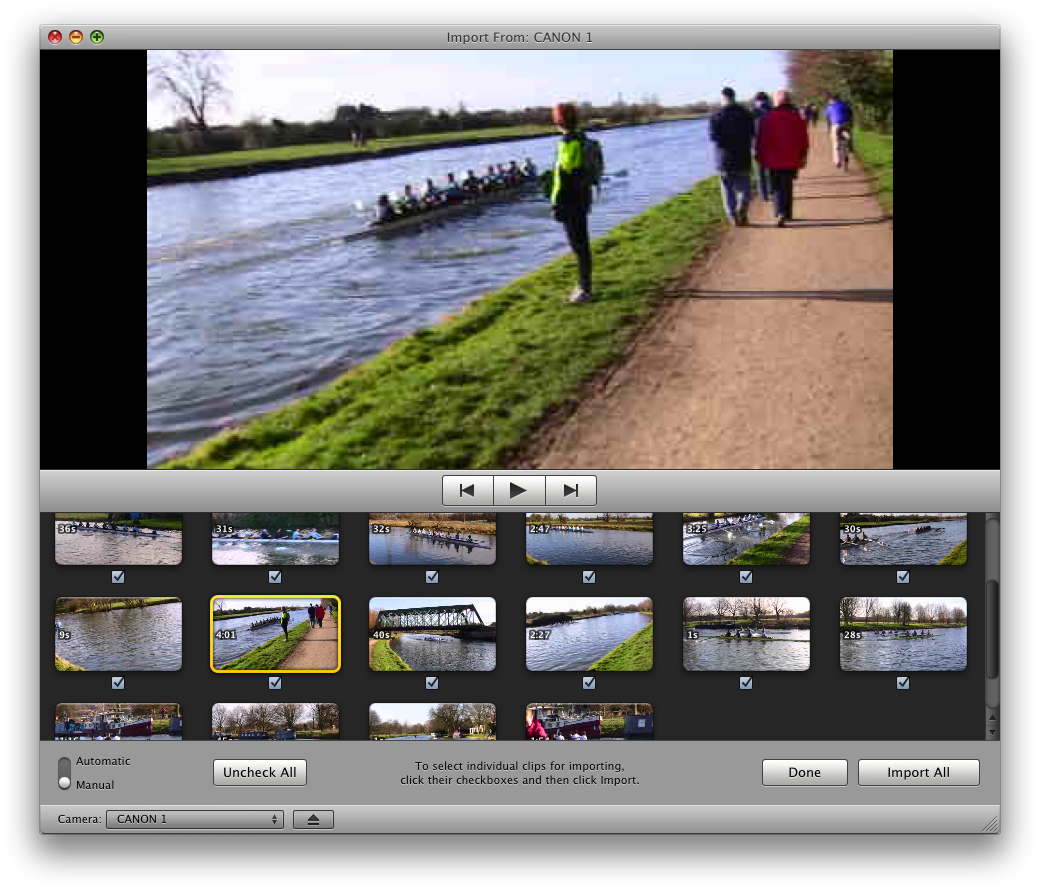
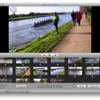 Import files by connecting the camera when iMovie is running and
let it do the ingestion in the usual fashion. iMovie definitely
does ingest these in full resolution and keeps interlace fields
and field order intact for interlaced sources, at least it does
with a US model Canon HF11 camcorder!
Import files by connecting the camera when iMovie is running and
let it do the ingestion in the usual fashion. iMovie definitely
does ingest these in full resolution and keeps interlace fields
and field order intact for interlaced sources, at least it does
with a US model Canon HF11 camcorder!
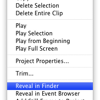
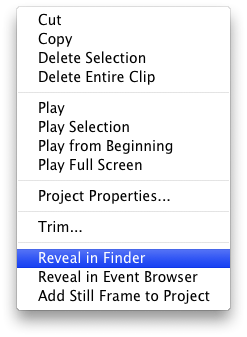
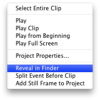 If you want to stabilise just specific clips within the event then
right-click on them and use "Reveal in Finder" to find the relevan
file within the iMovie Events directory structure (you can do this
on any clip, either in the Events or Projects area). Use your
favoured external stabiliser application then. Specific settings
for iStabilize are given in Appendix C.
If you want to stabilise just specific clips within the event then
right-click on them and use "Reveal in Finder" to find the relevan
file within the iMovie Events directory structure (you can do this
on any clip, either in the Events or Projects area). Use your
favoured external stabiliser application then. Specific settings
for iStabilize are given in Appendix C.
- Edit your movie as normal.
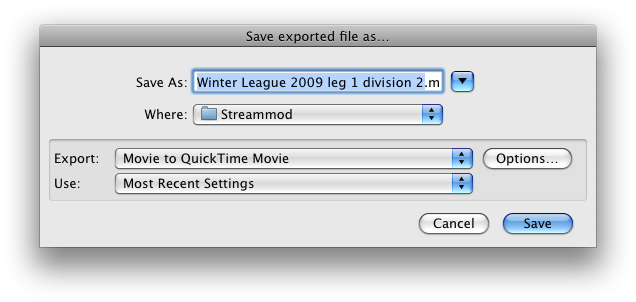
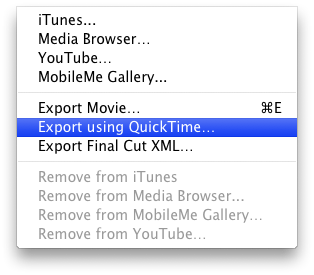
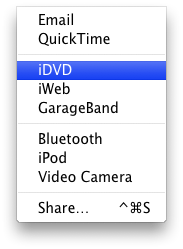
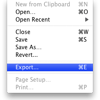
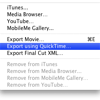 To export the movie in full HD with interlaced fields intact, use
"Share -> Export Using QuickTime...".
To export the movie in full HD with interlaced fields intact, use
"Share -> Export Using QuickTime...".
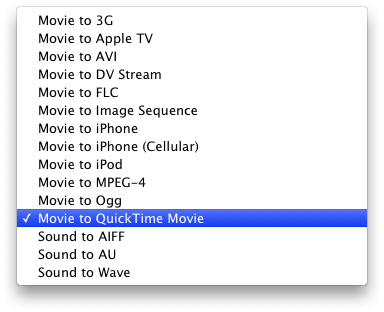
 In the "Export" pull-down menu, choose "Movie to QuickTime Movie".
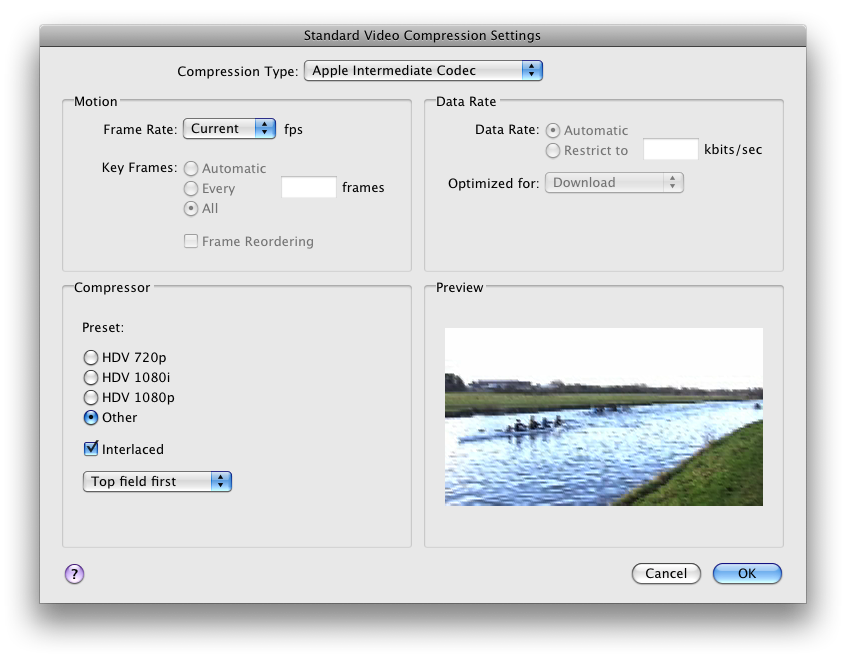
 Click on "Options..." to show the extra options window.
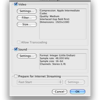
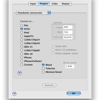
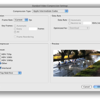
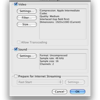
 Here, for the "Video" section, click on "Settings" and set it as follows
(most of the things below are the default values anyway):
Here, for the "Video" section, click on "Settings" and set it as follows
(most of the things below are the default values anyway):
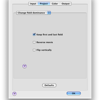
- Compression Type: Apple Intermediate Codec
- Frame Rate: [Current] fps
- Key Frames: All
- Frame Reordering: Off
- Data Rate: Automatic
- Optimized for: [Download]
- Preset: Other (important!)
- Interlaced: Ticked for interlaced material, else unticked

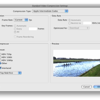
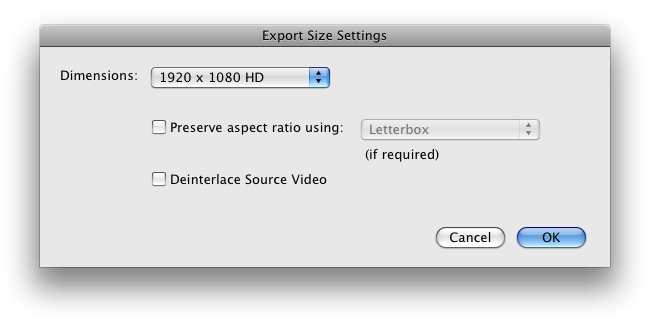
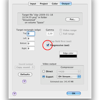
 Click on 'Filter' if you really want to filter the whole movie
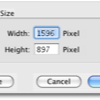
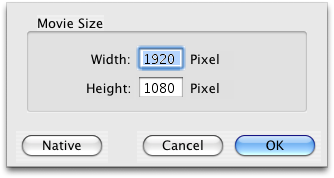
(unlikely), else click on "Size...". Here:
Click on 'Filter' if you really want to filter the whole movie
(unlikely), else click on "Size...". Here:
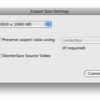
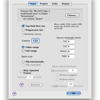
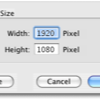
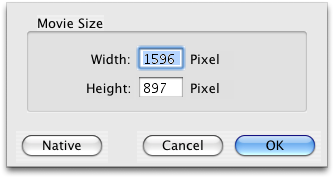
- Dimensions: [1920 x 1080 HD] (important! - do not use the "HD 1920 x 1080 16:9" entry, since for whatever reason, it does not do the same thing; the movie resolution is lowered a little below 1920x1080, scaling your video and a crude deinterlacing filter seems to get forced on).
- Preserve aspect ratio (etc.): Off
- Deinterlace Source Video: Off (obviously)
In the 'Sound' section set things up however you want and make sure that "Prepare for Internet Streaming" is off.
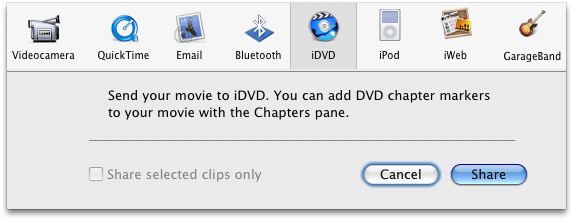
- You'll end up with a gigantic Apple Intermediate Codec movie at genuine 1920x1080 resolution fully interlaced complete with all transitions etc. set in iMovie. You can then import this into iDVD for further work (but beware crude SD downconversion - see later), or compress it to another format using your compressor of choice (assuming you want to be sure interlacing is maintained - else why not just export in the desired progressive format directly from iMovie in the first place?).


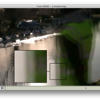
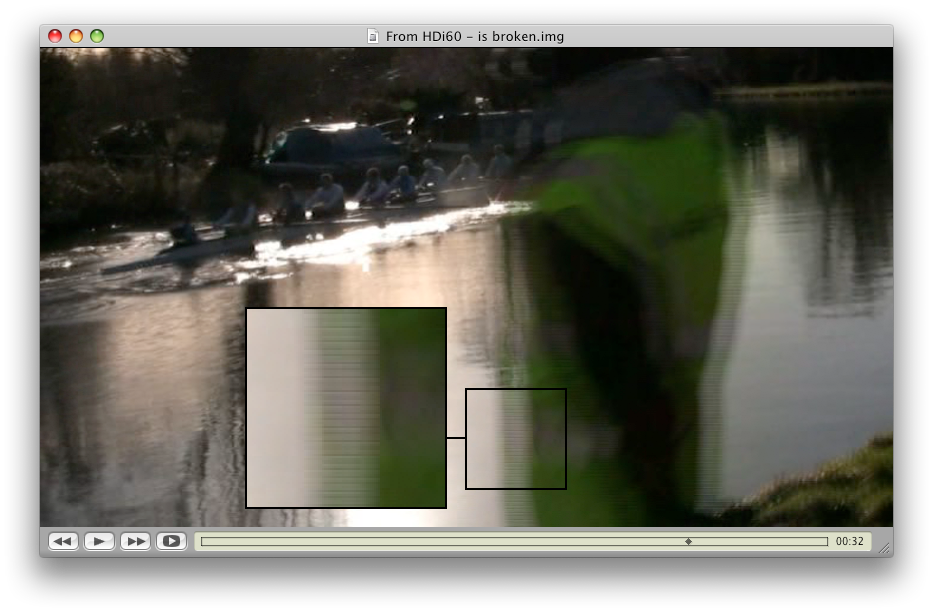
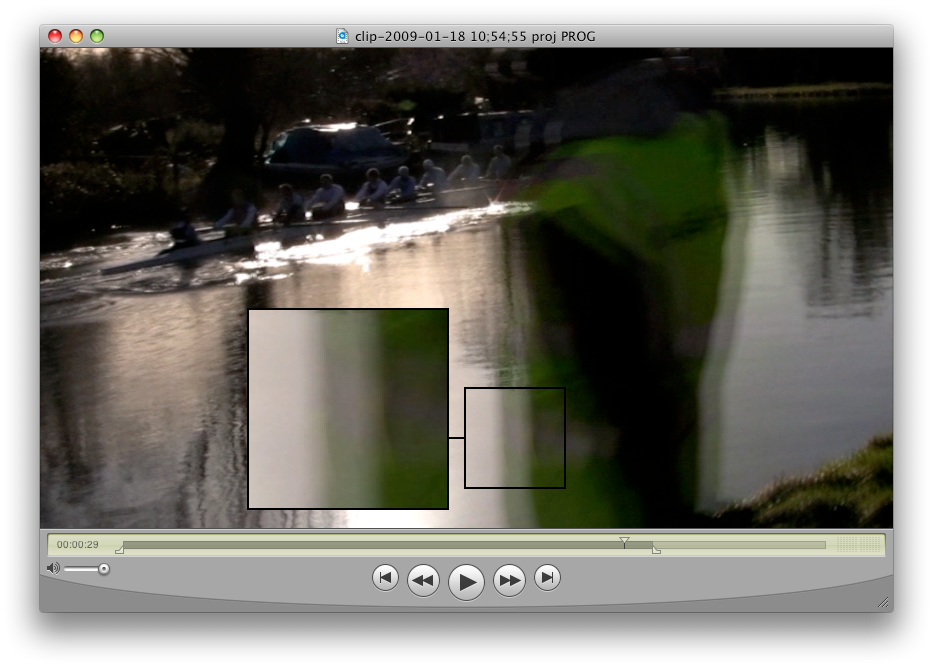
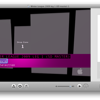
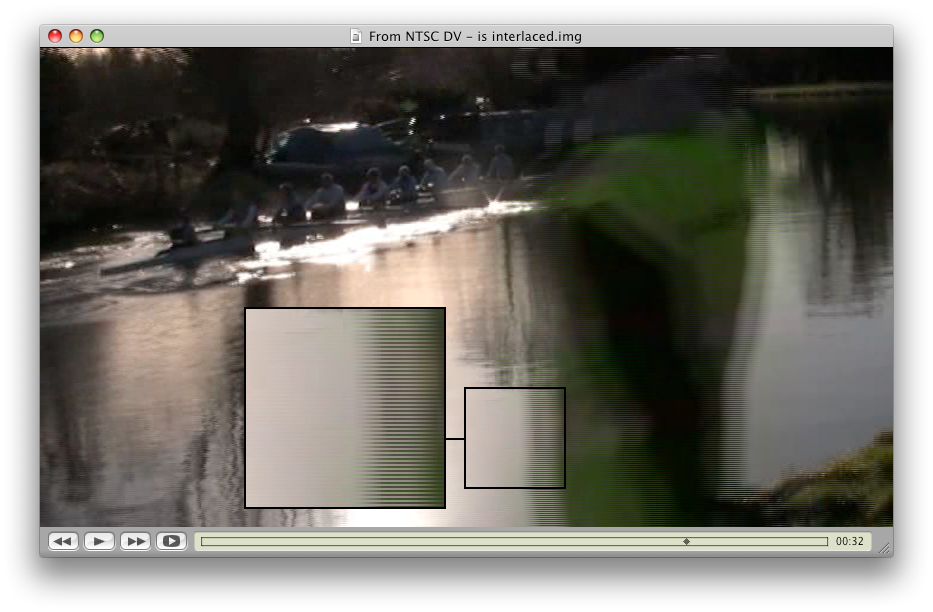
By default QuickTime Player does not deinterlace interlaced source material on playback, making it a quick way to visually confirm that interlacing has been preserved throughout the workflow - just play the movie.
Burning DVDs, Chapters and SD downconversion
If you want to keep your movie in HD then the rest of the guide here isn't very relevant to you. Just convert the movie with whatever tools you prefer.
Direct import
If you want to author a standard definition DVD from your HD interlaced master, you'll probably want to keep interlacing intact and probably want to add chapter points at custom positions, rather than the regular spacing offered by the automatic chapter point creation in iDVD. If you don't care about interlace or chapters then just:
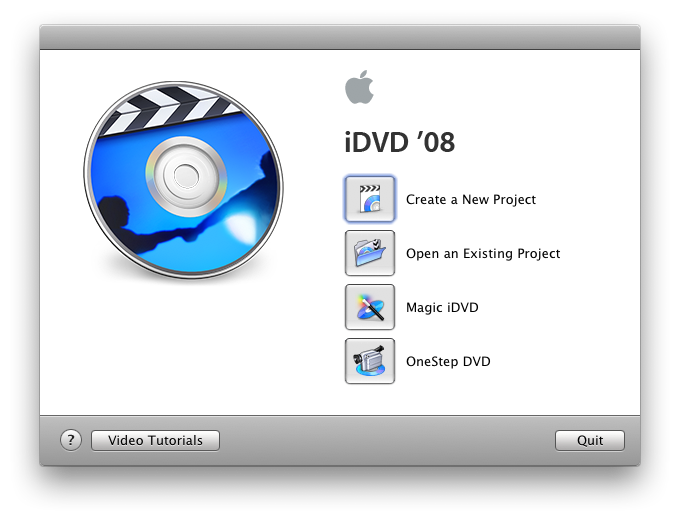
 Open iDVD and create a new blank project.
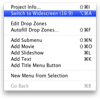 Select the theme you want and, if necessary, change the project
aspect ratio using "Project -> Switch to [Widescreen|Standard]".
Select the theme you want and, if necessary, change the project
aspect ratio using "Project -> Switch to [Widescreen|Standard]".
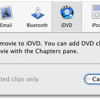
 Go to "File -> Import -> Video..." and select your full exported movie.
 Edit and burn your project as normal. iDVD does a rather poor
downconversion to standard definition progressive - it seems to
just treat each interlaced field pair as one giant frame and
resize that to SD resolution, so there are artefacts. If you're
not fussy, though, it's really not all that bad with real
moving video and it's certainly a fast route to getting a DVD.
Edit and burn your project as normal. iDVD does a rather poor
downconversion to standard definition progressive - it seems to
just treat each interlaced field pair as one giant frame and
resize that to SD resolution, so there are artefacts. If you're
not fussy, though, it's really not all that bad with real
moving video and it's certainly a fast route to getting a DVD.


The best way I've found to get chapter points is to import your finished iMovie '08 exported .mov file into iMovie HD, the older iMovie editor, define chapter points there then use iMovie HD's export-to-iDVD feature. More on this later.
Downconversion
If you want the best quality SD result then downconvert your HD master to NTSC as follows:
- Successful way to make a true NTSC interlaced DVD - Get JES Deinterlacer (freeware):
http://www.xs4all.nl/~jeschot/home.html
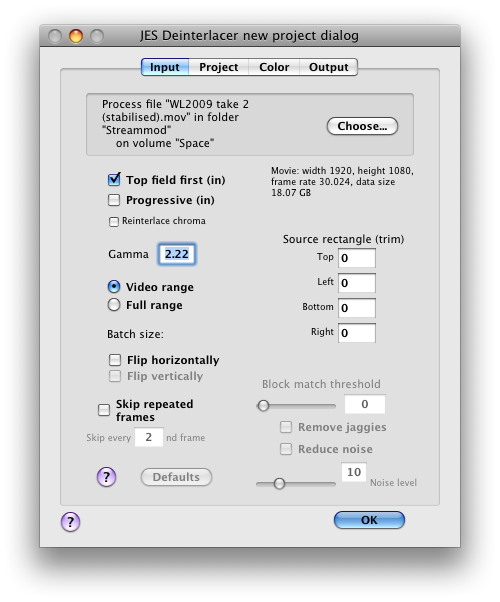
 Drag your 1920x1080i60 movie to the project dialogue box. If
you have a top-field-first movie (likely) then make sure the
relevant option is ticked in the "Input" tab. Leave other
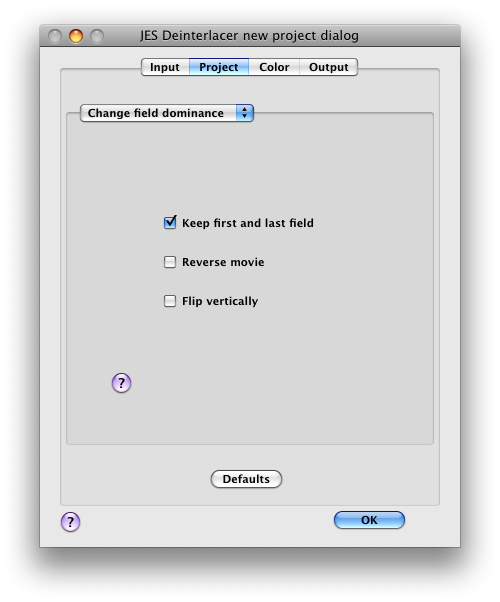
settings alone. In the "Project" tab, select either "Bare
project" if your source video is bottom-field-first, else
choose "Change field dominance" - NTSC is bottom-first so we
MUST reverse fields else the output will be broken (subtle
if watched on a PC, maybe on some flat panels too, awful on
a true interlaced TV though).
Drag your 1920x1080i60 movie to the project dialogue box. If
you have a top-field-first movie (likely) then make sure the
relevant option is ticked in the "Input" tab. Leave other
settings alone. In the "Project" tab, select either "Bare
project" if your source video is bottom-field-first, else
choose "Change field dominance" - NTSC is bottom-first so we
MUST reverse fields else the output will be broken (subtle
if watched on a PC, maybe on some flat panels too, awful on
a true interlaced TV though).
- If using "Change field dominance", tick "Keep first and last
child" if you want the movie length retained exactly but the
first and last frames somewhat softer, else leave all options
turned off, but note the output will be 1 frame shorter (this
is only likely to be a problem for very careful audio/video
sync movies).
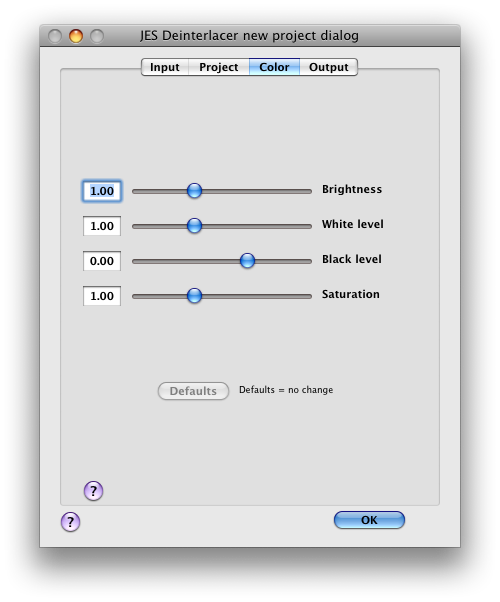
 You can
leave the colour settings at their default values unless you
want to deliberately alter colour balance at this stage.
You can
leave the colour settings at their default values unless you
want to deliberately alter colour balance at this stage.
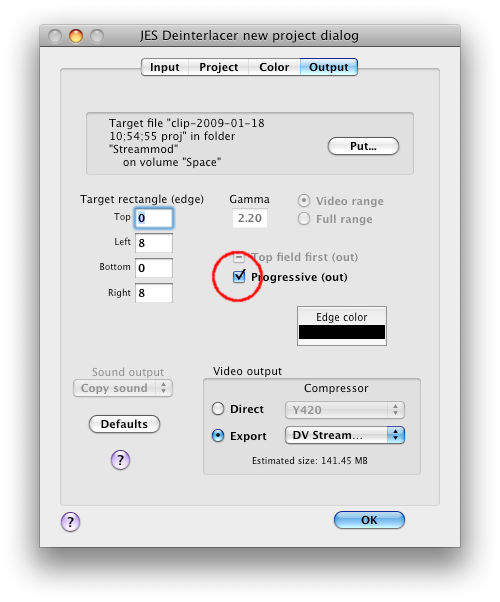
 Regardless of the above, in the Output tab, leave all options
alone (especially, don't set "Top field first" here - this is
for output settings and we're writing NTSC, which uses bottom
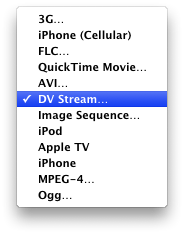
field first). Use the "Export" option rather than "Direct".
Regardless of the above, in the Output tab, leave all options
alone (especially, don't set "Top field first" here - this is
for output settings and we're writing NTSC, which uses bottom
field first). Use the "Export" option rather than "Direct".
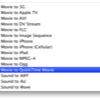
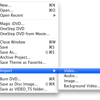
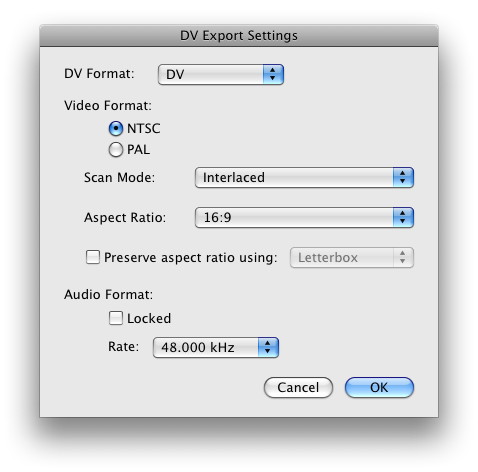
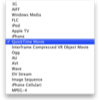
 Choose "DV Stream...".
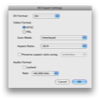 In the options window that appears when
the menu item is selected, use:
In the options window that appears when
the menu item is selected, use:
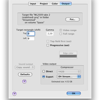
- Format: [DV]
- Video format: NTSC
- Scan mode: [Interlaced]
- Aspect ratio: [16:9]
- Preserve aspect ratio...: Off
- Audio format: As you prefer, ideally matching the input movie to avoid quality loss through sample rate changes. Dunno what the "Locked" option means so leave it alone :-)
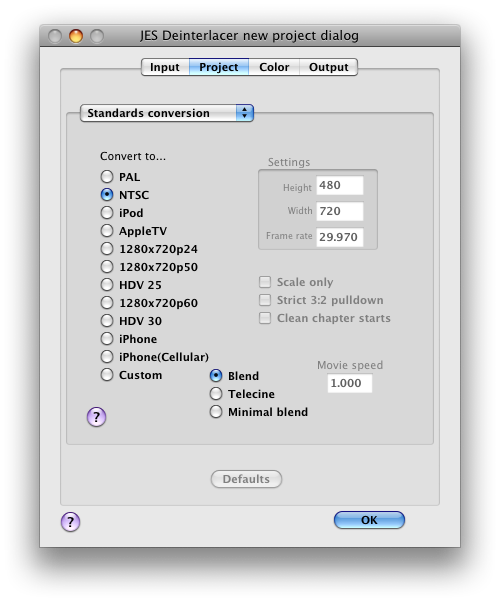
 If you want genuine progressive footage in iDVD for whatever
reason, then use the "Standards conversion" method in the
"Project" tab. It seems to do a reasonable job - better than
iDVD's dodgy scaling anyway!
If you want genuine progressive footage in iDVD for whatever
reason, then use the "Standards conversion" method in the
"Project" tab. It seems to do a reasonable job - better than
iDVD's dodgy scaling anyway!

Adding chapters
Now you're ready to export to iDVD. If you don't need chapters then just follow steps (i)-(iv) above. If you want chapters but want to keep interlace quality, do the following:
- Start iMovie HD, the older iMovie version available from Apple at no cost to iLife '08 users: http://support.apple.com/downloads/iMovie_HD_6
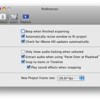
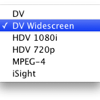
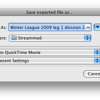
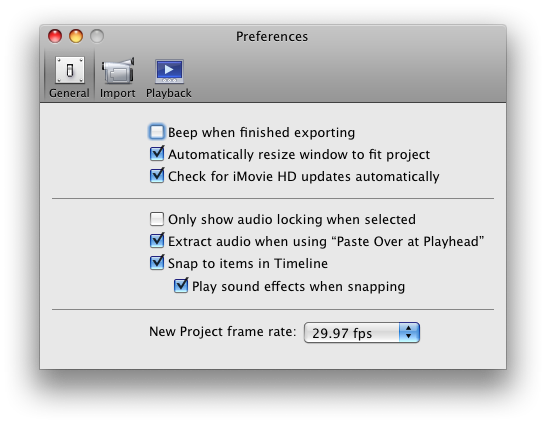
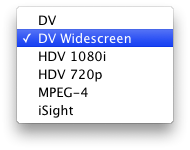
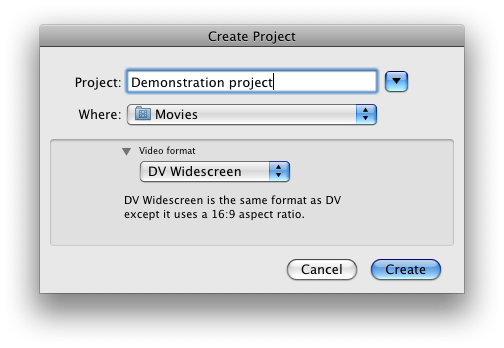
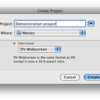 Start a new project. In the 'Save' window that opens, note the
pull-down menu underneath the file pane - choose "DV Widescreen"
here. You may need to check iMovie HD Preferences beforehand to
set the right frame rate (29.97 for NTSC, 25 for PAL).
Start a new project. In the 'Save' window that opens, note the
pull-down menu underneath the file pane - choose "DV Widescreen"
here. You may need to check iMovie HD Preferences beforehand to
set the right frame rate (29.97 for NTSC, 25 for PAL).
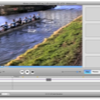 Drag your SD master DV movie into the clips area at the top
right of the project editor window. It shouldn't take very long
for iMovie HD to import the file. Now you can drag the clip to
the timeline and add chapter points in the usual way. You may
also take this opportunity to add filters or effects, edit
volume and so-on for last minute touching up of the movie.
Drag your SD master DV movie into the clips area at the top
right of the project editor window. It shouldn't take very long
for iMovie HD to import the file. Now you can drag the clip to
the timeline and add chapter points in the usual way. You may
also take this opportunity to add filters or effects, edit
volume and so-on for last minute touching up of the movie.
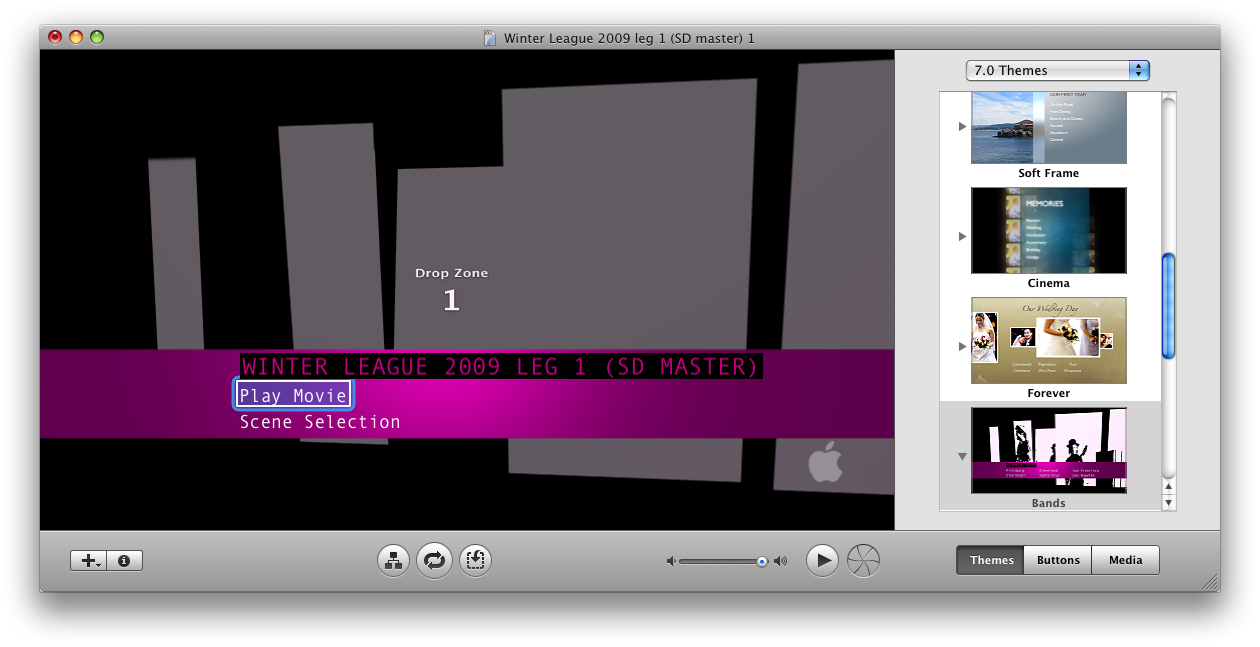
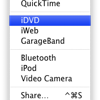 When you're happy with the result, use the "Share -> iDVD"
menu to export to iDVD in the usual fashion. For me at least,
iDVD then ends up burning an interlaced disc. Looking at the
MPEG artefacts I think it might be treating the frames as
progressive in practice, but the end result retains very
fluid motion regardless - certainly smoother than if the
movie had been converted to progressive outright.
When you're happy with the result, use the "Share -> iDVD"
menu to export to iDVD in the usual fashion. For me at least,
iDVD then ends up burning an interlaced disc. Looking at the
MPEG artefacts I think it might be treating the frames as
progressive in practice, but the end result retains very
fluid motion regardless - certainly smoother than if the
movie had been converted to progressive outright.
 So - nice, fluid interlaced SD motion from an HD source at
low software cost, if you're prepared to put in the legwork!
So - nice, fluid interlaced SD motion from an HD source at
low software cost, if you're prepared to put in the legwork!

Appendix A: Workflow summary
An idea of the length of time it takes to complete each step (user aside - just the pure analysing / rendering / exporting parts) is given. That's for a Mac Pro 8 x 2.8GHz with its internal HDD - pretty much all steps seem CPU limited so fast RAID arrays are unlikely to make any difference, except for backing up and archiving material afterwards.
- Import footage into iMovie and edit movie as desired.
Overall execution speed: Moderate (half realtime to realtime)
- Optionally stabilise individual movie clips taking the originals
from the "iMovie Events" folder structure and importing back into
iMovie using the "Import Movies..." menu entry.
Overall execution speed: Very slow (5x to 10x realtime)
- Export a full quality HD movie by careful use of iMovie's export
settings (see step (4)).
Overall execution speed: Quite slow (roughly double realtime)
- If planning on burning a DVD at high quality, either deinterlace
the HD source using JES Deinterlacer's standards conversion
project, or use a field dominance changer project and export to
interlaced NTSC (see steps (VII) to (XI))
Overall execution speed: Slow (roughly 5x realtime)
- Import SD file to iMovie HD, add chapter markers and export to
iDVD
Overall execution speed: Fast (about 1/20th realtime)
- Do whatever else you want to the iDVD project and burn the disc
or a test disc image.
Overall execution speed: Encoding depends on numerous parameters with menu durations, source video (if already SD, encoding seems a little quicker than if HD) and so-on.
- Overall total estimation: Probably around 20-30 minutes of processing for every minute of edited movie footage (ouch), though this assumes you do every step including stabilizing your entire movie.
Appendix B: Storage space guide
In terms of file sizes, the peak size tends to be at the iMovie import stage - the worst-case Apple Intermediate Codec full HD file sizes appear there. It appears that iMovie '08 does not render transitions to disc unlike iMovie HD - it does it all on the fly, so there's no real disc space overhead. The project files refer to assets in the "iMovie Events" folder so they're very small compared to video data (just a few MB).
Here's a very rough guide to file sizes I saw on my project:
- 24 minutes of raw AVCHD footage, 1920x1080i60, after iMovie ingestion: About 27GB, so not far off 1GB per minute.
- 22.5 minutes rendered video with transitions, also at full HD, exported from iMovie: About 21.5GB, so again, around 1GB per minute.
- Copy of movie exported by iStabilize: 18.5GB, probably smaller because zooming and extrapolated border areas introduced by the settings I used will have allowed more efficient compression, even for a lossless encoder. Very unlikely that the stabilised movie size will exceed the original movie size.
- SD NTSC interlaced DV format file exported by JES Deinterlacer: About 4.5GB.
- Overall total estimation: Roughly 3.25GB per minute.
Appendix C: Video stabilisation
I use iStabilize for video stabilisation - this is a commercial application available from http://www.pixlock.com/.
If you use iStabilize, you will almost certainly get the very best results by feeding individual clips from the iMovie Events folder and tuning the stabiliser settings for each. However, you can export a full edited 1080i movie from iMovie and stabilise that if you're really just looking at, say, a collection of similar cross-faded footage. Assuming you understand the various fields in the iStabilize edit interface you should be able to get good results with minimal messing around (only one movie file to motion-track, edit and export).
- Open an interlaced Apple Intermediate Codec 1080i movie and set the ranges for motion tracking in the usual way.
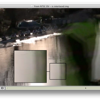
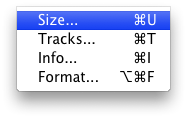
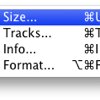 Go to "Movie -> Size" and click on the "Native" button to force
the window up to 1920x1080 - I'm not sure if this is strictly
necessary but I had some inexplicable downscaling on the output
at times when I didn't do this, making me wonder if the window
size used during stabiliser track editing somehow influenced the
resolution of the output file too. Better safe than sorry.
Go to "Movie -> Size" and click on the "Native" button to force
the window up to 1920x1080 - I'm not sure if this is strictly
necessary but I had some inexplicable downscaling on the output
at times when I didn't do this, making me wonder if the window
size used during stabiliser track editing somehow influenced the
resolution of the output file too. Better safe than sorry.
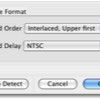
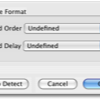
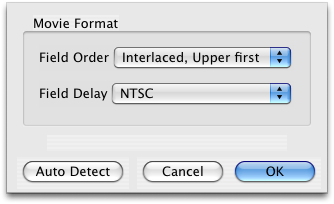
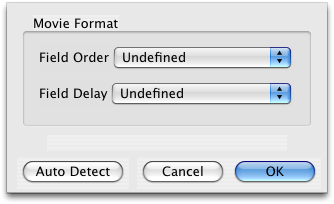
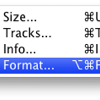 Go to "Movie -> Format" and click on "Auto Detect" if the settings
are not already filled in. In most cases you will end up with
"Field Order: [Interlaced, Upper first]" and "Field Delay: [NTSC]"
(or PAL of course, if that's what you're using).
Go to "Movie -> Format" and click on "Auto Detect" if the settings
are not already filled in. In most cases you will end up with
"Field Order: [Interlaced, Upper first]" and "Field Delay: [NTSC]"
(or PAL of course, if that's what you're using).
- Do all your motion tracking and stabiliser track editing stuff, so that you're ready to export the stabilised result.

 Go to "File -> Export..." and in the "Exporter" pull-down menu
choose "QuickTime Movie". Make sure "Single Field" is not
ticked. Click on "Settings...".
Go to "File -> Export..." and in the "Exporter" pull-down menu
choose "QuickTime Movie". Make sure "Single Field" is not
ticked. Click on "Settings...".
 The values here are more or less the same as for exporting a full
HD movie from iMovie '08.
The values here are more or less the same as for exporting a full
HD movie from iMovie '08.
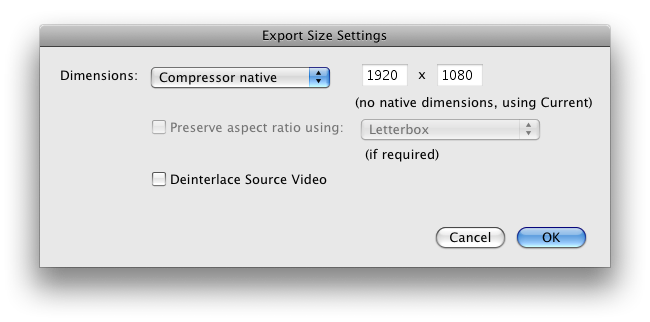
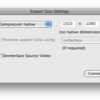 In the "Size..." settings, I find
I can just set "Compressor native" and the right size is guessed
but again, if you want to be explicit, choose "1920 x 1080 HD"
and not "HD 1920 x 1080 16:9". Set up audio as you see fit and
export - then wait...!
In the "Size..." settings, I find
I can just set "Compressor native" and the right size is guessed
but again, if you want to be explicit, choose "1920 x 1080 HD"
and not "HD 1920 x 1080 16:9". Set up audio as you see fit and
export - then wait...!
- Import to iDVD (steps (i)-(iv)) possibly via SD downconversion, maybe using iMovie HD for chapter points.


That's all!